Out of the box, Windows 10 allows you to search the web right from the taskbar. However, the search engine is set to Bing, and there is no option to change it like you can in the Edge browser.
This is surely to irk many Windows users, but luckily, the folks over at Mozilla decided to ease our pain by creating a way to set Google as the default search engine for the Windows 10 taskbar, albeit with a little trickery.
Step 1: Download & Install Firefox Nightly
Head on over to the official Firefox Nightly page and download the latest version of Firefox Nightly. And if you're already running Firefox, don't worry, the Nightly will play nice with it.
Step 2: Open Firefox Nightly Search Preferences
Open a new tab, and in the address bar, type in the following:
about:preferences#search
Hit Enter to go to the Search preferences on the left-hand panel.
Step 3: Choose Search Engine & Set as the Windows Default
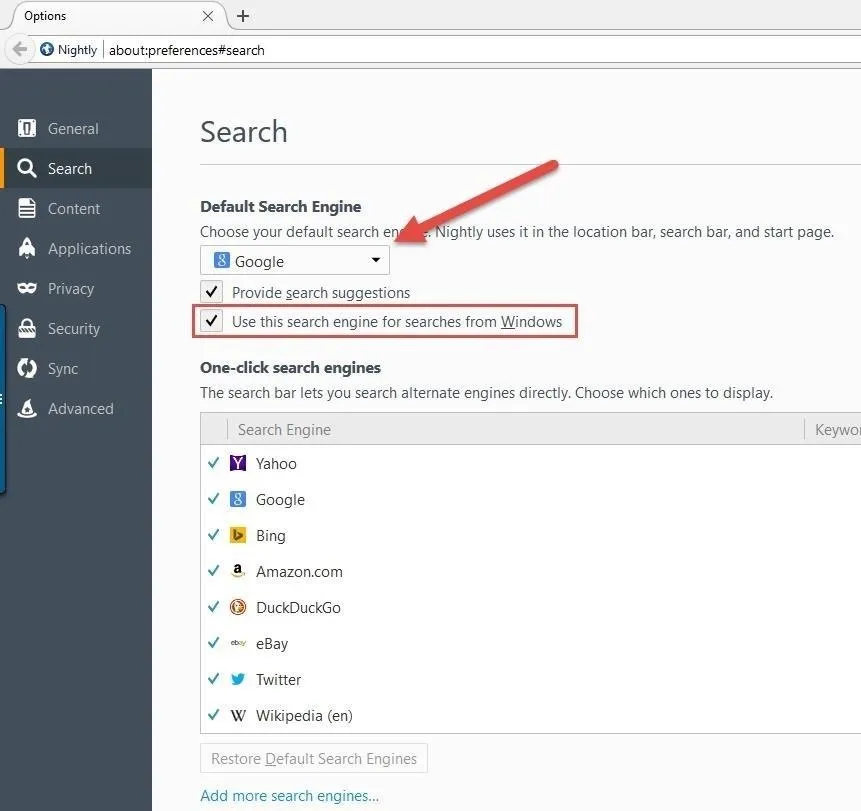
Choose your search engine from the drop-down menu (in this case, Google, but there's also options for Yahoo, DuckDuckGo, etc.), then make sure to check the box next to the option, "Use this search engine for searches from Windows."

That's it! If you ever want to go back to Bing, go to the search preferences again and uncheck the option, "Use this search engine for searches from Windows."
You do need to have Firefox as your default browser in order for this to work, but you will need to keep the Nightly installed until Microsoft releases a native way to change this (don't hold your breath).
Regardless, now you have Google (or whatever search engine you chose) set as the default for Windows 10. Let us know if you made the change in the comments below.


Comments
No Comments Exist
Be the first, drop a comment!