Windows 10 runs on laptops, desktops, tablets, and even phones—but even though the operating system should scale accordingly, fonts and icons aren't always perfectly sized for every screen. Luckily, though, there's a handy new menu for adjusting the size of your screen's contents, which you can use to make everything bigger or smaller to match your preferences.
- Don't Miss: How to Customize the Windows 10 Command Prompt
Step 1: Open Display Settings
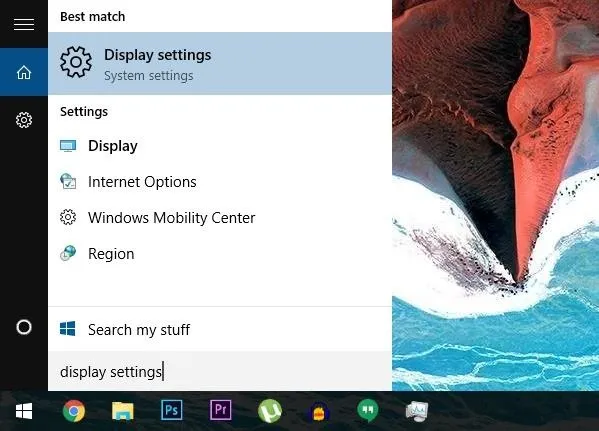
If you'd like to adjust the size and scale of fonts and icons on your screen, you just need to access the right menu. To begin, press the Windows button on your keyboard, then type "Display Settings" and hit Enter.
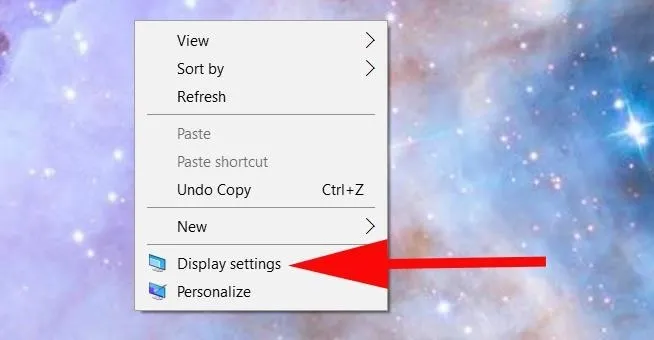
You can also access Display settings by right-clicking an empty area on your Desktop.
Step 2: Adjust the Font Size
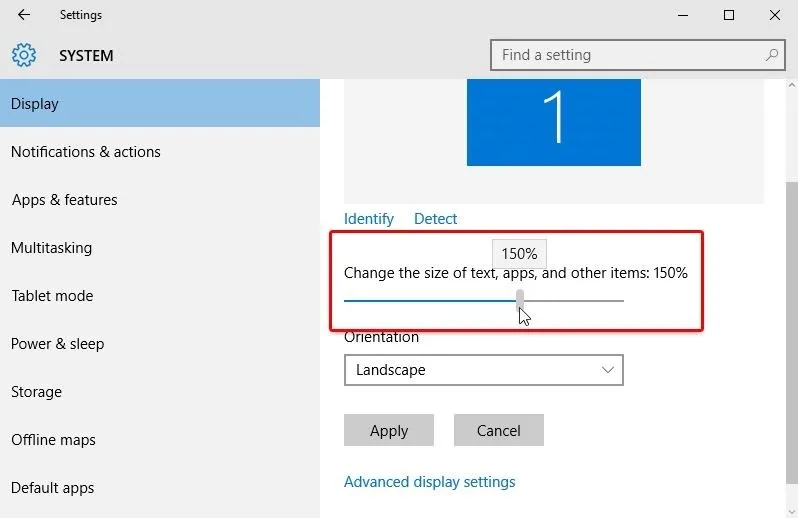
Next up, use the provided slider to "Change the size of text, apps, and other items," which ranges from the default 100% up to a much larger 175%.
Step 3: Apply Your Changes & Log Out
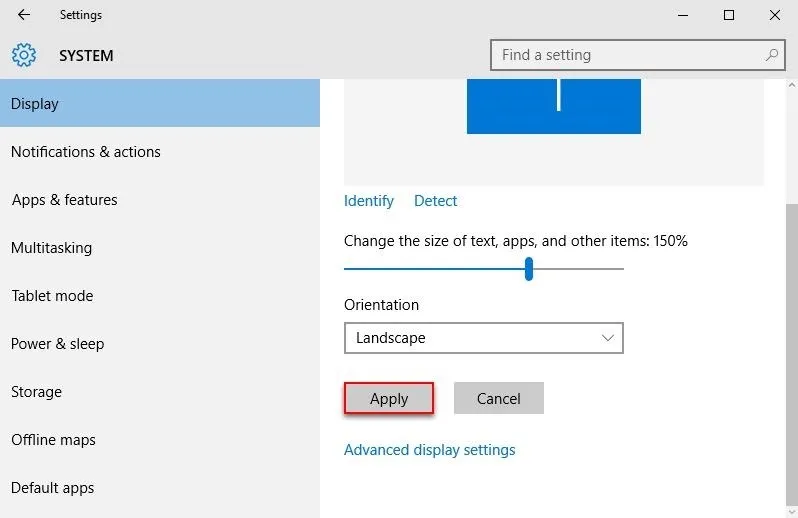
Once you've got the font and icon size set to your liking, click the "Apply" button directly beneath the slider to make your changes permanent.
At this point, you'll see a message informing you that you'll need to log out of your account temporarily so that Windows can load up the resized fonts and icons. Click "Sign out now" on this message to take care of that.

Step 4: Log Back in to See the Results
To wrap things up, simply log back into your Windows account, and the fonts and icons on your screen will be using their new sizes. If you'd like to try a different percentage, simply repeat Steps 2 through 4 in this article.
What percentage did you decide to go with for your fonts and icon sizes? Let us know in the comment section below, or drop us a line on Facebook, Google+, or Twitter.


Comments
No Comments Exist
Be the first, drop a comment!