Uninstalling programs in Windows is not the nicest procedure. Some programs bundle a nice uninstaller with them which helps to ease the process. Other programs, mainly those that utilize the Windows Installer technology, begin the uninstall process right away. This can potentially be problematic for users who are trigger-happy with the mouse.
Windows Vista and beyond includes an uninstall confirmation prompt, which acts as a line of defense in ensuring that users did not accidentally uninstall a program they did not intend to.

Now this will not sit well with some users and they will check the box to disable it. However, once this box is checked, Windows will never prompt you again. Once again, this can be problematic, since you're essentially stuck with this choice.

But there is a light at the end of this dark tunnel. There is a registry tweak that can bring back the uninstall confirmation prompt to ensure you have less "OH GOD, THAT WAS A HUGE MISTAKE" moments when managing your programs. Best of all, this tweak works in Windows Vista all the way up to Windows 10.
Step 1: Open the Registry Editor
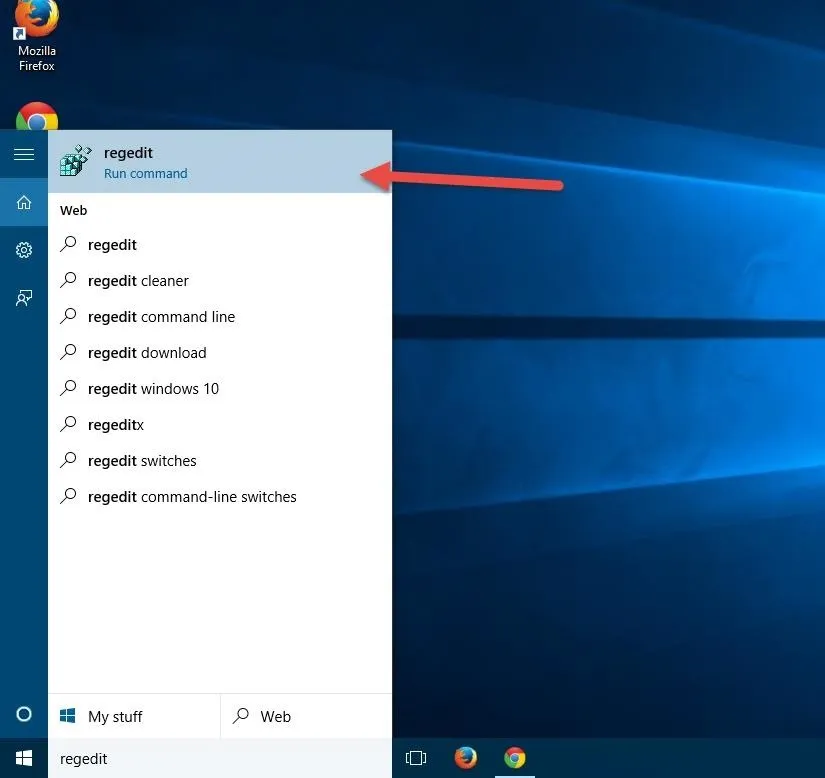
Click on the Start menu and type in regedit to access the registry editor.
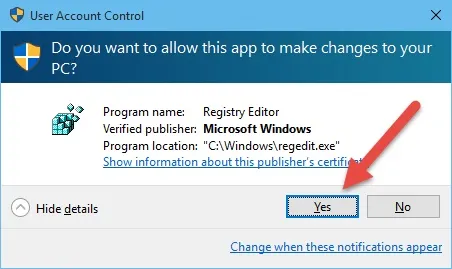
Depending on your security settings, you might get a User Account Control prompt—just click on Yes.
Step 2: Go to the Following Directory
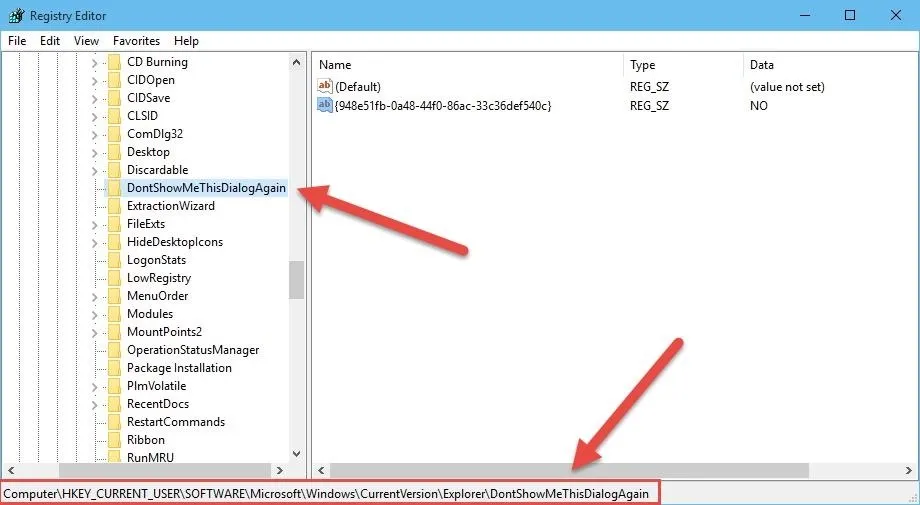
Inside the Registry, you will want to navigate to the following directory:
HKEY_CURRENT_USER\SOFTWARE\Microsoft\Windows\CurrentVersion\Explorer\DontShowMeThisDialogAgain
Step 3: Perform the Magic!
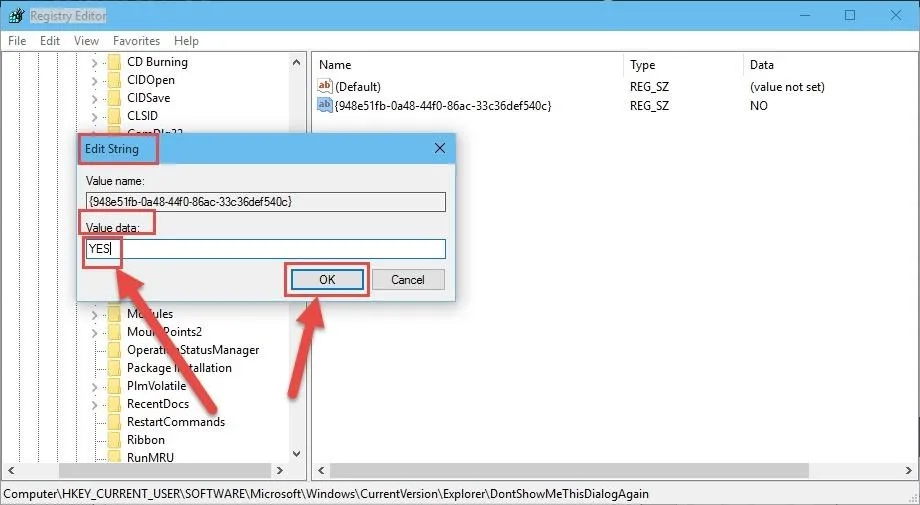
In the right pane, look for the following string of characters:
{948e51fb-0a48-44f0-86ac-33c36def540c}
...which should have its value set to NO.
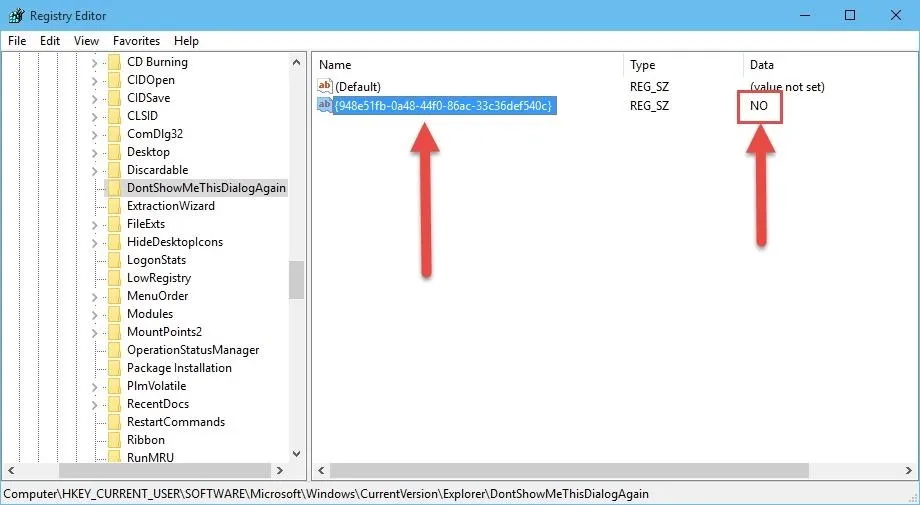
Double-click on the string, and in the Edit String box that pops up, set its "Value data" to YES and click on OK.
Alternatively, you can choose to right-click on the string and Delete it.
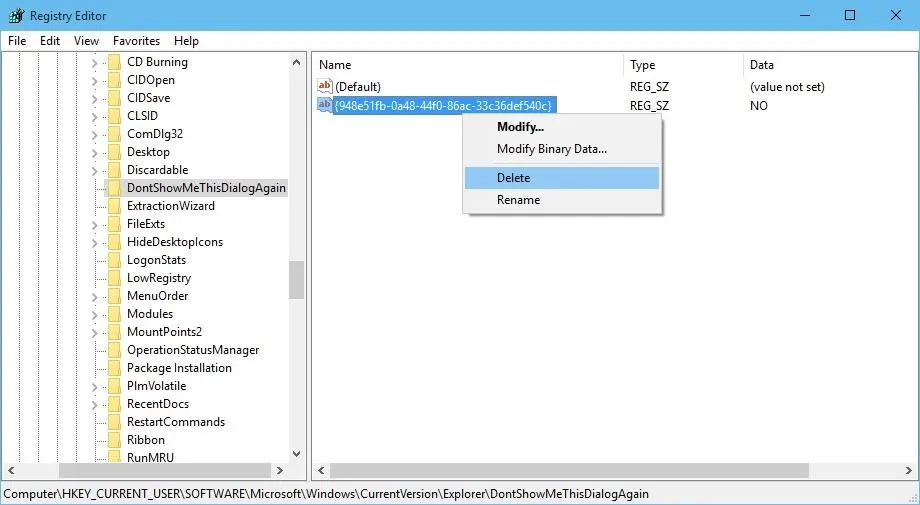
Click Yes on the confirmation prompt.

You now have the uninstall confirmation prompt back. It's strange why Microsoft has no option to enable the uninstall confirmation prompt once you have disabled it. Luckily, by following this guide, you have the prompts back and some peace of mind when managing your programs.
For more tips on using Microsoft's latest OS, make sure to check out all of our Windows 10 tips and tricks. And follow Gadget Hacks over on Facebook, Google+, and Twitter for updates on Windows 10.


Comments
No Comments Exist
Be the first, drop a comment!